Monday, May 11, 2015

Dill Pickle Soup Will Cure All Your Woes

I make soup. I make soup ALL the time. I love soup. I could eat soup every day of my life.

I have been seriously neglecting my blog and that's a fact Jack! But now here is a little update....

Some friends and I took a little adult field trip to the Detroit Institute of Art to see the Faberge exhibit then to a late lunch at the Polish Village Café in Hamtramck. Where we proceeded to eat until our bellies reached max capacity!!

I'm not sure what part of my meal was my fav, but I can tell you the cup of DILL PICKLE SOUP I had and that I have had there many times got me jonsing to make some on my own. So as soon as I got home I got online and did a little searching for a recipe that seemed to match PVC! GUESS WHAT!! This recipe says it's from there! OH HAPPY DAY!!!

http://www.foodnetwork.com/recipes/dill-pickle-soup-recipe/index.html

I know dill pickle soup sounds weird but it's not like drinking hot pickle juice. It's a mild soup and slightly creamy. Depending on how you make it depends on the depth of the broth.

I've made 2 huge pots of this soup not only because I love it but because I think my friends are is addicted to it.

I followed this recipe as is. Its obviously very easy to double if you want more.


So enjoy and Keep on Making Stuff!!

Dill Pickle Soup
Recipe via Food Network/Polish Village Café

Ingredients
5 tablespoons butter or margarine
5 medium carrots, shredded
2 large potatoes, cubed (about 2 cups)
3 large dill pickles, shredded
1 cup flour
1 cup sour cream
Salt
Pickle juice


Directions
Combine 5 cups water, the butter, the carrots and potatoes in a saucepan. Bring to a boil and cook until the potatoes are tender. Add the pickles and continue to boil.


Meanwhile, whisk together the flour, sour cream and salt in a separate bowl. Add enough water to make a paste, then slowly, to avoid curdling, add the mixture to the soup to thicken. Bring to a boil, then remove from the heat. Add pickle juice, to taste.


Tuesday, May 27, 2014

Take that Mosquitos!


I don't mind bugs...matter of fact most of them serve a purpose and I feel like if they leave me alone I'll leave them alone. Except for Mosquitos! What us it with these jerky bugs, what's their purpose?? I'm pretty allergic to most bug bites but I find mosquito bites hurt the worst. 
Well the hubby and I try to do our part to be environmentally friendly so I saved these really cool glass whiskey bottles over the past year but wasn't sure what to do with them...then I got a mosquito bite! Insert me grumbling swear words here!!! 
So these super cool bottles shall now become weapons of mass mosquito destruction!!! 
After a trip to the hardware store and the dollar store I was ready to assemble my weapons..I mean tiki torches haha!

So here ya go! 
Enjoy and Keep on Making Stuff!

Supplies:
-Glass bottles (I used 6 whiskey bottles but you can make these with any sort of bottle you like)
-Metal washers ( must fit the mouth of the bottle with a hole wide enough for the tiki wick to fit through)
-Glue (glue the washers down. I used E6000)
-Glass marbles ( I used these to take up space in the bottle and support the wick. You could use rocks or even that really fun colorful rock used in aquariums)
-Tiki torch wicks 
-Citronella oil

Assembly:
-Fill your bottles about 1/4 full with the marbles or filler you chose. 
-Glue your washers on (let the glue dry before moving on)
-Fill bottles with torch or citronella oil
-Insert your wick (let wicks soak in bottle before lighting) 

Hey look at that your very own repurposed bottle turned into something pretty dang cool! 

Anndddd nowwww for my fantastic photography skills ahaha!

Monday, April 21, 2014

Krrraazzzyyy about Kale

I've always been a fan, but Kale was sort of hard to find most of the time. Now it seems Kale is the trendy hipster of leafy veggies and can be seen at all the latest grocery hot spots haha!
My latest snack obsession is the oh so crispy and tasty kale chip! I'm really addicted!
It's pretty simple to make them. So here ya go!

Enjoy and Keep on Making Stuff!

Ingredients 
A bunch of kale (it really shrinks down in the oven)
Olive oil
Sea salt (if you want)
Spices ( I added smoky paprika to the last bath....amazing)

Directions
-preheat oven to 250F
-Wash and dry kale
-Cut or tear off the rib. You want to do this because the rib is bitter.
-Tear the kale into 1-2 inch pieces
-Put all the kale in a gallon zip lock or large bowl. 
-Add a 2-3 table spoons of olive oil. The amount will depend on the amount if kale you have.
-Toss kale in oil. Be sure ALL of the kale is covered.
-Pour the kale onto a large baking sheet.
-sprinkle with salt and or spices of choice
-bake at 250 for about 15mins. Turn the kale over and cook for another 15mins.
-I check it every 10-15 mins and turn it over until it's to the crispness I prefer. 
-once it's at your desired crispness take it out of the oven and try not to eat it in all one sitting!

And now for the pics! Lol
And the only bad part about Kale chips....lmao!

Tuesday, July 30, 2013

Did you know.....

Did you my dog eats poop? Yep! He's not even partial to his own, he even eats Lucy's poop!!
Ugh he's such a boy dog! He likes all things stinky and gross. Thank goodness he is unusually adorable, smart and hilarious!
Anyway this is not a becoming habit and something had to be done.
I did some research and wanted to try something natural if possible.
My reading and research brought me to puréed pumpkin as a solution. I spoke to my vet and she said it was totally safe and has worked.
So for the past 10 days I have been putting a heaping tablespoon of puréed pumpkin in their food each day and guess what....
It worked!!! 
My darling Charlie B. has passing up the poop!!
So if your 4 legged friend is munching on their own poo this might help!!
See he's totally embarrassed!!

Thursday, July 18, 2013

Watermelon Lime Sorbet

OK first my June Fish Taco challenge didn't go over so well so I'm just going to pretend it was awesome. So awesome I cannot reveal the top secret recipe. Yeah that's it! Top secret ahaha!

July's challenge to myself will be better. Yup it will.

And nowww for sorbet!

So what do you do when your super cool Mommie Dearest gives you HALF a watermelon that's the size of the moon. This thing was seriously huge. Even after I ate a chunk of it there was still 100 pounds left. Ahaha! I kept asking this question what am I going to do with this melon.

I had a taste for sorbet so sorbet it became.

I don't know where I saw this recipe or if it's exact but this is what I used and how I made it....

Ingredients:
5-7 cups of watermelon
1/2 of lime juice
1 cup of water
1/4 cup of sugar or less. I wanted to use Agave but I was out.

Directions:
Boil the water add the sugar to make a simple syrup add the lime juice. Let this cool while you cut up your watermelon.
Put the watermelon in a blender or food processor whichever you have is fine.
I pulsed it a few times to give it a rough chop. Now pour in your simple syrup with lime juice and puree the melon until it's the consistency you like.

Once this is done pour your mixture into your ice cream maker and follow the normal freezing instructions. I have a Cuisinart model and all I have to do is pour all my ingredients in and turn it on.

So about 25 mins later I had the most perfect watermelon lime sorbet ever. The consistency is fantastic. It still has a little chunky quality from the watermelon. SO GOOD!

I imagine if I added some tequila this would be the perfect summer margarita.

Oh I did add a little more lime juice as it was churning because I wanted more citrus.

Enjoy and Keep on Making Stuff!


Wednesday, June 19, 2013

Best beef and broc I've ever had!!

Oh Pinterest you did it again! You showed me right to the best beef and broc recipe ever!

What's funny is I didn't have any broc so I just used a boat load of peppers and onions. This my friends was brilliant! More like a pepper steak with this twist.

I followed the recipe exactly in terms of the marinade. I didn't have any sherry on hand for the sauce so I left that out. Made no diff it was so amazing without! Oh and if course I used different veg because if our lack of broc!

Enjoy and Keep on Making Stuff!!
Here is the recipe link. 
http://rainydaygal.com/2011/02/03/beef-with-broccoli/

Don't forget your fuzzy leopard print slippers, chopsticks and some Anthony Bourdain on the DVR while you eat this bowl of awesome!!!


Friday, June 14, 2013

May was a mushroom challenge

So I am a tad late on this update.
For May my gal pal from the mean streets of Pacific Heights, MO sent me this recipe. Jan and I exchange food stories and ideas all the time. She's pretty much the MO version of me but about 6 inches shorter. Trust me though this does not make her any less awesome!!

She chose the May challenge of a portabella recipe. So I did a little of my own modification and it came out so good!

Let's get right to it!

What you'll need....
2 medium sweet onions
4 portabella caps
2-4 cups of fresh spinach
1 10oz jar of roasted red peppers
2 cups of shredded cheese (your choice, I used havarti)
3 cups of shredded chicken (I roasted a chicken the night before but you can just grab a rotisserie chicken from your local grocer)
1/4 olive oil (I add this to the pan gradually as I sauté the vegg as needed)

How to....
Heat some of the olive oil in a large skillet
Slice and toss in your onions and sauté until translucent
Gradually add your spinach to wilt
I chopped up the roasted red peppers to more bite size pieces before I added to the pan.
Let simmer and hang out for a few until everything has had a chance to shake hands and say their hellos
While this is happening clean and scrape out your port caps and give them a little rub down with some olive oil to keep them from getting burnt.
Put on a foil lined baking sheet.

Now all your veg have said hello add the chicken give it a little stir.

I didn't do this with any grace I just piled the vegg and chicken mix on the caps as evenly as possible. Pile it on sky high!

Put this awesome creation in the oven at 350 for about 15-20 mins. Before you take it out add your cheese if you want cheese.

And voila! Yummy shroomy veggie awesomeness! If you are a vegetarian omit the chicken and this is just as freaking great!!

I love this it's a fav in my house!

Wednesday, April 24, 2013

Challenge yourself!

I decided each month I am going to challenge myself and make, bake, cook and or do something I have never done before.

I should have started this in January to be all official 2013 but whatever. April will do.

This month my cooking challenge was QUICHE. Crust less quiche to be exact because nobody needs more carbs in their life. Well maybe someone does but not in my house we don't. Yummy delicious warm golden crusty carbs! OK I'm done! My wonder twin in St. Louis also joined my challenge and made the quiche and what's weird is she sent me a pic of her quiche and I thought why is Jan sending me my quiche pic back. WONDER QUICHE POWERS! Ahaha!

My do something challenge is to run as much of a 5k as possible on the street and beat my walking time. I will be doing that this Saturday 4/27/13 on Belle Isle for this 5k. http://detroitsynergy.org/register-7th-annual-belle-isle-5k-runwalk/
I have my music all ready to go to keep me going. I'll be the one working her inner Beyonce while she's running. WORK IT!! You have to make it fun so why not do a little booty shaking. Still time to sign up and join in on the fun!

The site I found the quiche recipe is fantastic! Here is the link:
http://budgetbytes.blogspot.com/2011/11/spinach-mushroom-feta-crustless-quiche.html

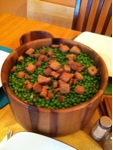
For the same meal I made a 7 layer salad with the normal salad fixings, but instead of the gross mayo topping I just gave different light options. It was delish! Look at the pic of my table, those peas were so fresh and green!

Then it was topped off with Chocolate Lasagna! Yes I said it! Chocolate Lasagna! Make it, eat it, love it, threaten to slap anyone's hand who touches it without your permission! Ahaha! I omitted the chips from the top. I mean c'mon I've already packed enough cals into this dish. Let's be realistic ahaha!
http://centercutcook.com/chocolate-lasagna/

My Mommie Dearest and her new hubby Steve enjoyed this feast with me!!

Thanks for visiting my blog!

Enjoy and Keep on Making Stuff!!

xoxox
Barbie


Monday, March 4, 2013

Crockin' some lasagna!

SO lately I have been using the Blogger app to update my blog. The options are limited but it works for doing entries on the fly. I cannot chose picture placement or anything fancy, or maybe I can and just haven't figured it out. Anyway that's why my recent entries have been a bit wonky.

Moving on!

I love my crock pot(s). I have 2. What a great invention!! I decided why not try lasagna in the crock. It's the same concept as the oven pretty much.

Enjoy and Keep on Making Stuff!

Crock Pot Turkey Lasagna

Ingredients (amounts will vary on the size of your crock)

2 pounds ground turkey or beef
1 can of diced tomatoes
3-4 cups of tomato sauce
2 small white onions
2 cups of chopped mushrooms
1 box of lasagna noodles
3-4 cups of ricotta or cottage cheese
3 cups of shredded mozzarella
Minced garlic (as much as you like)
Random seasoning (I'm a spice a season kind of gal so I m always tossing in random stuff into my food)

*note* if you don't have just plain old tomato sauce use your fav spaghetti sauce that will work just fine.

Directions
Rough chop the onions and mushrooms. Sautee in a large pan. (large because you'll be added the meat and sauce to it)
Add the turkey or meat of choice in the pan with the onions and mushrooms and brown. (if you used beef be sure to drain off the excess grease)
Add diced tomatoes, tomato sauce, garlic, and seasoning to the meat mixture, give it a good stir.

I sprayed the inside of my crock with a little olive oil to help prevent sticking.

The next part I just eyeballed there was no real measuring going on. Sorry.

Scoop enough of your sauce to cover the bottom of the crock. Not thick but just enough.
Add a couple scoops of ricotta on top of that. Don't worry if it doesn't spread, it will as it cooks.
Sprinkle a little mozzarella on the ricotta
Grab a couple lasagna noodles. I had to break mine in different sizes to get coverage. See pictures below. Cover your sauce cheese layers with the noodles and give it a little press.
Repeat the above steps until your crock is about full or you have used all your ingredients.

I cooked mine on high for 2 hours and then put it on warm and let it cook for another 4. This part will depend on your crock and the time you have.

Once it was done I sprinkled a little more mozzarella on top and let it get melty. OH YEAH!!

SUPER DUPER EASY and it was so good. Even better the next day as it usually goes with pasta and sauce.

I did not follow a recipe for this I pretty much winged it. So add or subtract what you like. Have fun that's what cooking is about. Oh and happy bellies!!


Friday, February 22, 2013

Potato...Potatoe

I really really cannot stand food that is 100% prepared in the microwave. It's never hot or heated through properly. It's just gross. Take the time and use the oven.

BUTTTTTT.......

In my countless hours pinning things on Pinterest I came upon this recipe several times for homemade potato chips cooked in the microwave. The reviews for the recipe were all great.

I have potatoes, I have a mandolin, I have a microwave! Let's give it a whirl.

First of all if you don't have a mandolin or something to get your taters sliced thin don't try this recipe. You need those slices thin people!

Let's get right down to business!
Here is a link right to the recipe
http://www.thekitchn.com/how-to-make-crispy-potato-chips-in-the-microwave-166718

The chips I made were super crispy and toasty tasting. My husband and I could not stop eating them.
If I had kids around this would be something fun for them to do. Make their own personal little bowl of chips! HECK YES!!

Enjoy and Keep on Making Stuff!

How To Make Microwave Potato Chips

What You Need
Ingredients
1 or more potatoes or other root vegetable, scrubbed clean
Salt and other seasonings, optional
Olive oil, optional

Equipment
Mandoline
Bowl of cold water
Microwave-safe plate
Paper towels

Instructions
1. Thinly Slice the Potato - Cut the potato in half. Slice one half on a mandoline, aiming for slices 1/8 to 1/16-inch thick. Immediately put the slices in cold water. Repeat with the other half of the potato and any other potatoes you are preparing.

2. Soak and Rinse the Slices - Rinse the slices in cold water until the water stays clear. If you have time, let them soak for a few extra minutes before rinsing.

3. Dry the Slices - Dry the slices between two clean dish cloths or spin them in a salad spinner.

4. Season the Slices - Arrange as many slices as will fit in a single layer on a dinner plate lines with a few paper towels. Make sure the slices do not touch or else they stick together. If desired, sprinkle with salt or other spices. For richer-tasting chips, brush the slices with olive oil first.

5. Microwave the Slices - Microwave the slices at 100% power for 3 minutes. Flip them over and microwave at 50% power for another 3 minutes. Remove any chips that are starting to crisp and brown. Continue cooking the remaining chips at 50% power in 1 minute intervals until they are all crispy and golden.

6. Repeat with Remaining Batches - Transfer cooked chips to a bowl and repeat microwaving with the remaining slices of potato.